

Stepping into the world of Rank Math SEO for the first time can feel a bit like walking into the cockpit of a fighter jet. You know it’s powerful, and you know it can take you exactly where you need to go, but the sheer number of dials, switches, and settings can be overwhelming.
If you’re feeling a little lost after hitting that “Activate” button, take a breath—you are in good company. Thousands of website owners have stood exactly where you are right now, staring at a dashboard full of potential, wondering which lever to pull first.
Table of Contents
- Laying the Foundation – Essential Pre-Setup Knowledge
- Getting Your Google Analytics Account Ready
- Defining Your Property and Regional Settings
- Identifying Your Professional Profile – Business Details
- Aligning Your Analytics with Strategic Business Objectives
- Awakening the SEO Giant – Installing the Rank Math Engine
- Establishing the Link – Connecting Your Rank Math Account
- Authenticating Your SEO Connection
- Part 20: Finalizing Your Site’s Connection
- Part 21: Choosing Your Path – The Rank Math Setup Wizard
- Defining Your Identity – The “Your Site” Section
- Integrating Your Insights – The Analytics Section
- Authorizing the Google Connection
- Linking Your Search Console Property
- Configuring Your Analytics Properties
- Monetization Insights – The AdSense Box
- Mapping Your Content – The Sitemaps Section
- Fine-Tuning Your SEO – The Optimization Section
- Crossing the Finish Line – Your Site is Ready!
- Managing Team Permissions – The Role Manager
- Monitoring Site Health – 404 Monitor & Redirections
- Structured Data – The Schema Markup Section
- Mastering Redirections – Keeping Your Site Error-Free
- Setting Up Instant Indexing
- Setting Up LLMS (Large Language Model Signals)
- Integrating Custom Fields – The ACF Module
- Dominating Local Search – Setting Up Local SEO
- Turning Strategy into Action – Optimizing Your Content
- Opening the Rank Math SEO Panel in Classic Editor
- Setting Your Focus Keywords
- Mastering the SEO Checklist
- Advanced Schema Customization in Classic Editor
- Perfecting Your Meta Title and Meta Description
- Global Metadata & Indexing Controls
- Global Meta Titles & Descriptions
- Fine-Tuning Visibility – Setting No Index
- Unlocking Growth – Rank Math SEO Pro Features
- Scaling with Unlimited Websites
- Winning Rich Results with Multi-Schema (Pro)
- Specialized Visibility – Additional Sitemap Modules
- Optimizing with Content AI Credits
- Strategic Insight with Google Trends Integration
- Mastering Data with Advanced Rank Tracking
- Advanced Analytics & Index Status Monitoring
- Beyond the Basics – Additional Pro Advantages
- Ready to Upgrade?
- Rank Math Free v/s Pro
- Why Rank Math is better than other SEO plugins
- Conclusion: Your Path to Search Mastery
The Seismic Shift in the SEO Plugin Landscape
For a long time, the WordPress SEO market was a predictable two-horse race. However, the landscape has shifted dramatically. While older players like All in One SEO (AIOSEO) and Yoast held the crown for a decade, Rank Math has undergone a meteoric rise that the industry hasn’t seen since the early days of WordPress.
As of 2026, Rank Math has officially crossed the 3 million active installation milestone on the WordPress.org repository. It has effectively leapfrogged legacy plugins to become the go-to solution for modern webmasters. But this isn’t just a popularity contest; it’s a reflection of a changing philosophy in search engine optimization. Users are no longer satisfied with “basic” tools; they want integrated AI, advanced schema, and deep analytics without having to install ten different plugins.
Why the “Switch” is Becoming a Standard
The hype surrounding Rank Math isn’t just clever marketing—it’s built on a foundation of extreme value. When you compare the feature sets, the gap becomes clear:
The Free Version Advantage: Rank Math offers features in its free tier—like a built-in 404 monitor, Redirection manager, and basic Schema generator—that competitors often hide behind a $100+/year paywall.
The “Unlimited” Factor: For agencies and portfolio owners, Rank Math Pro changed the game by offering a “Personal” license that supports unlimited websites, a sharp contrast to the “per-site” billing model that has become the frustrating industry standard.
What This Definitive Guide Will Accomplish
Whether you are migrating from a different plugin or starting a brand-new project, the way you configure your SEO foundation today will determine your traffic trajectory for years to come. This isn’t just another “how-to” blog post; this is a comprehensive masterclass designed to take you from a blank slate to a fully optimized SEO powerhouse.
In the following chapters, we are going to break down:
- The Perfect Configuration: Moving through the Setup Wizard with precision.
- Advanced Module Mastery: Knowing which features to toggle “On” and which to leave “Off” to maintain site speed.
- The Content AI Workflow: How to use Rank Math to write for both humans and algorithms.
- The Pro Decision: An honest, fluff-free look at the Premium features to see if they actually justify the investment for your specific niche.
You are in the right place to turn your website into a search engine favorite. Let’s dive into the core configuration.
Laying the Foundation – Essential Pre-Setup Knowledge
Before we dive into the toggles and switches of the Rank Math dashboard, we need to address the “ground rules.” One of the most common reasons SEO campaigns fail before they even start is a misunderstanding of the environment in which the tools are operating.
The Critical Distinction: WordPress.org vs. WordPress.com
To ensure this guide is effective for you, we must clarify one vital point: throughout this masterclass, every mention of “WordPress” refers exclusively to WordPress.org (the self-hosted version).
While they share a name, they are fundamentally different ecosystems:
WordPress.org (Self-Hosted): Think of this as owning your own home. You have full access to the plumbing, the electrical, and you can install any “appliances” (plugins like Rank Math) that you want. This is the version required to unlock the full potential of Rank Math’s advanced features.
WordPress.com (Hosted Service): This is more like renting an apartment. While it’s easier to move into, the “landlord” (Automattic) restricts what you can install. Unless you are on their expensive Business or Commerce plans, you generally cannot install Rank Math or other third-party SEO plugins.
If you are currently on the free version of WordPress.com, you won’t be able to follow the steps below. For those who want the technical deep-dive on this comparison, I recommend checking out my separate guide, “The Great WordPress Divide,” where I break down the ownership and SEO implications of both platforms.
Why “Slow SEO” is Better Than “Fast SEO”
I want to offer a word of advice: Pace yourself. The Rank Math SEO suite is incredibly comprehensive. It covers everything from basic metadata to advanced Schema markup and AI-driven content analysis. If this is your first time navigating these waters, the sheer volume of options can lead to “settings fatigue.”
I have designed this guide to be an exhaustive resource—something you return to over several sessions. There is no prize for finishing the setup in five minutes. In fact, rushing through the Setup Wizard is how most users accidentally “no-index” important pages or mess up their sitemap structure. I strongly suggest you bookmark this page now. Treat this as a living manual; go through one section, apply the settings to your site, verify they are working, and then come back for the next module.
A Note on Transparency and Support
Before we click “Install,” I want to be fully transparent. This article contains affiliate links for Rank Math. As a dedicated affiliate partner, I may earn a small commission if you decide to purchase a Pro license through one of my links.
Here is why this matters to you: This commission comes at zero extra cost to you, but it allows me to spend the dozens of hours required to research, test, and write these 9,000-word deep dives. I only recommend tools that I use on my own high-traffic “money sites,” and Rank Math is at the top of that list. If you find this guide helpful and choose to support my work through these links, I truly appreciate it—it keeps this content free and updated.
Choosing Your Version: Free vs. Pro
For the purpose of this setup walkthrough, I will be using the Free version of Rank Math.
Why? Because I believe you should never pay for a tool until you understand how to use its core functions. Rank Math’s free version is more powerful than the paid versions of many other plugins. It provides a robust foundation for 90% of websites.
However, toward the conclusion of this guide, I will provide a dedicated “Pro Analysis” section. If you already own the Pro version, don’t worry—the setup process is 100% identical. The Pro version simply “unlocks” extra doors within the same house we are about to build.
So without wasting any more of your precious time, let’s start…..
Getting Your Google Analytics Account Ready
Before we get into the actual Rank Math settings, you need to have a Google Analytics account set up. While Rank Math handles a lot of SEO tasks, Google Analytics does something different: it tracks what people do once they arrive at your site. It shows you where your visitors are coming from and which pages they like the most.
Setting this up now is a smart move. Rank Math has a special feature that lets you connect your Analytics data directly to your WordPress dashboard. This means you can see your traffic stats without having to leave your website. If you skip this now, you’ll just have to come back and do it later, so it’s better to get it out of the way now to keep your setup moving smoothly.
Stepping Into the Analytics Dashboard
To initiate your tracking journey, you first need to access the Google Analytics environment. This is where you will build the “container” that stores your website’s traffic data.
1. Access and Authentication
The first step is to visit the official portal at analytics.google.com. You will be prompted to log in; use your standard Google or Gmail credentials here.
Once you have successfully signed in, you will be directed to the primary Google Analytics interface. If this is a brand-new account, you will see a welcoming landing page designed to help you get started.

2. Initiating the Setup
From the main dashboard, look for the “Start Measuring” button. Clicking this is the formal beginning of your account creation. This process is essentially a handshake between you and Google, where you tell the system who you are and what website you intend to monitor.
3. Why This Interface Matters
It is important to get familiar with this dashboard now. While Rank Math will eventually pull this data into your WordPress site, knowing how to navigate the official Google Analytics page is a valuable skill. It allows you to:
- Verify Data in Real-Time: Ensure your connection is working instantly.
- Deep Dive into Reports: Access advanced demographic and behavioral data that goes beyond the basic SEO stats.
- Manage Permissions: If you ever hire an SEO expert or an assistant, this is where you will give them secure access to your data.
By completing this initial login and clicking that first setup button, you’ve taken the most important step in moving from a “guesswork” strategy to a “data-driven” strategy for your website.
Once you have initiated the process, the very first window you will encounter is dedicated to Account Creation. This serves as the overarching folder for your website’s data.
1. Naming Your Account
The initial field you must address is the “Account Name” found under the Account Details heading. This name is for your internal organization, so you should choose something that makes it immediately recognizable to you. Popular choices include:
- The specific name of your blog.
- Your registered website name.
- A broader company or project name if you plan to manage multiple sites later.
2. Tailoring Data Sharing Preferences
Directly below the naming field, you will find a series of checkboxes regarding data sharing. These settings determine what level of information you are comfortable sharing with the Google ecosystem. You have full control here:
- Review each option carefully based on your personal or business privacy standards.
- You can enable or disable these based on your specific preferences without affecting the basic functionality of your tracking.
3. Moving Forward
Once you have entered your chosen name and reviewed the sharing options to ensure everything meets your requirements, simply click the “Next” button. This action saves your administrative foundation and moves you directly into the next stage: creating your specific website property.
Defining Your Property and Regional Settings
After finalizing your account’s administrative structure, you will proceed to the Property Creation stage. In the Google Analytics ecosystem, a “Property” represents the specific digital asset—such as your website, blog, or mobile app—that you intend to track.
1. Naming Your Property
The first requirement in this section is the “Property Name” field. This should be a descriptive name that helps you distinguish this specific site from others you may track in the future. Most experts recommend using your website or blog name as the property name to maintain consistency across your reports.

2. Configuring Regional Details
The “Property Details” box also contains two critical settings that directly influence how your data is processed and displayed:
- Reporting Time Zone: Select the time zone that aligns with your primary business operations or your target audience. This setting determines the “day boundary” for your reports; for instance, it dictates exactly when one day ends and the next begins in your traffic charts.
- Currency: Choose the currency you wish to use for your financial reporting. If you run an eCommerce store or use monetization features, this is the currency Google will use to display revenue and transaction values.
3. Finalizing the Step
Take a moment to verify that the name, time zone, and currency are accurate, as these foundational settings shape your data’s permanent structure. Once you have double-checked these details, simply click the “Next” button to move forward to the business information phase.

Identifying Your Professional Profile – Business Details
After defining your property’s technical settings, you enter the Business Details phase. This step is designed to help Google Analytics 4 (GA4) understand the context of your website so it can provide more relevant reporting templates and benchmarking data.
1. Selecting Your Industry Category
In this section, you must choose the “Industry Category” from a predefined list that most accurately describes your website’s niche. This is an important selection because:
- Tailored Reports: Google uses this information to suggest industry-specific goals and reports that might be useful for your particular field.
- Benchmarking Insights: It allows you to eventually compare your site’s performance (such as engagement rates or user retention) against other websites within the same industry category.
- Selection Tip: If your exact niche isn’t listed, choose the “Other” category or the closest general match (e.g., “Internet & Telecom” or “Computers & Electronics” for a tech blog).
2. Defining Business Size
Next, you will indicate your “Business Size” based on the number of employees in your organization. Options typically range from:
- Small: 1–10 employees
- Medium: 11–100 employees
- Large: 101–500 employees
- Very Large: 500+ employees

Even if you are a solo operator, selecting the “Small” category helps the system refine your dashboard experience for a smaller-scale operation.
3. Transitioning to Objectives
Once you have selected both your category and size, double-check that they represent your current setup. Simply click the “Next” button to proceed to the Business Objectives section, where you will define the specific goals you want to track for your site.
Aligning Your Analytics with Strategic Business Objectives
Once you have defined your business size and industry, you will reach the Business Objectives stage. This is a pivotal step in the Google Analytics 4 (GA4) setup because it determines how the platform will personalize your reporting and recommendations based on what you value most.

1. Navigating Your Measurement Options
In this section, you are presented with several distinct categories to track. You can select the specific goals that align with your website’s mission:
- Generate Leads: Ideal for measuring actions that indicate potential customer interest, such as filling out contact forms or requesting service quotes.
- Drive Sales: Essential for analyzing and optimizing actual financial transactions and online sales performance.
- Understand Web and/or App Traffic: Focuses on measuring overall visitor volume and identifying which channels are successfully driving traffic to your site.
- View User Engagement & Retention: Centers on learning how people explore your content and services, as well as how often they return.
- Other Business Objectives: A versatile option if your specific goals do not fit neatly into the predefined categories above.
2. Choosing the Right Fit for Your Site Type
While you can choose multiple objectives, focusing on the two most relevant ones is often recommended for the best reporting experience. Depending on your site’s focus, here is the best way to choose:

- For Content Creators and Bloggers: The most effective combination is typically “Understand Web/App Traffic” and “View User Engagement & Retention.” These choices prioritize metrics like readership patterns and how long visitors stay engaged with your articles.
- For Service-Based Business Sites: “Generate Leads” is usually the primary focus. This ensures your dashboard highlights inquiries and successful conversions.
- For eCommerce Platforms: “Drive Sales” is the indispensable choice. It aligns your analytics with tracking purchase behaviors, checkout funnels, and revenue data.
3. Progressing to Data Collection
After ticking the boxes that best represent your site’s intent, review your selections to ensure they reflect your current roadmap. Once you are satisfied, you can move forward to the final stages of the configuration process.
Confirming the Terms of Service
After setting your objectives, a pop-up will display the Google Analytics Terms of Service Agreement. This is a standard legal requirement to activate your account.
To proceed:
- Select your country at the top of the window to ensure the terms match your local regulations.
- Check the consent box to agree to the data processing terms.
- Click the “I Accept” button.
This short “handshake” completes the legal setup, allowing Google to begin securely handling your website’s data.
Selecting Your Platform
The next phase involves configuring your Data Collection source. Within the “Choose a Platform” box, you will see several options. Since you are setting up tracking for a blog or website, select the “Web” option to move forward. This tells Google Analytics to prepare for incoming data from your domain.
Configuring Your Web Stream
In this step, you will link your specific site to the analytics engine. Simply enter your blog or website address into the “Website URL” field. Next, provide a “Stream Name”—you can use your blog’s title or any name that helps you identify the data source easily.
Once these fields are filled out, click the “Create & Continue” button to finalize the connection.
Bypassing the Manual Tag Setup
Shortly after, a popup labeled “Set up a Google tag” will appear. You can safely dismiss this by clicking the “X” in the top-left corner.
There is no need to manually deal with the code provided here. One of the best features of Rank Math is that it handles this technical integration for you automatically once we link the plugin to your account in the next phase of the setup.
Understanding Web Stream Details
Following the previous step, a “Web Stream Details” window will open. This screen displays the technical specifications of your new data connection, including your unique Measurement ID, the stream URL, and various tracking configurations.
These details are what Google uses to identify and organize the data coming from your site. However, since we are using Rank Math to bridge this connection, you do not need to copy or save any of this information manually. Simply click the “X” in the top-left corner to close the window and proceed.
Verifying the Data Collection Source
You will now be redirected to the main Data Collection overview page. At this stage, you should see your specific website URL appearing in the list. This is a visual confirmation that your property has been successfully created and that Google Analytics is now prepared to receive incoming traffic information from your domain.
Take a quick look to ensure the URL matches your site perfectly. Once you have verified the details, click the “Next” button to move toward the finalization of the account setup.
Final Verification – Data Collection Status
The final screen in your Google Analytics setup will display a notification stating that “Data collection is pending.” This message is a confirmation that your configuration is technically complete. It is perfectly normal to see this for a brand-new property, as Google requires a short period (usually 24 to 48 hours) to process the initial activity once visitors begin arriving at your site.
Since you have successfully established the connection point, there is no further action required within the Google interface. You can now safely close the Google Analytics tab and return to your WordPress dashboard. From there, we will begin the final integration process using Rank Math to link everything together seamlessly.

Awakening the SEO Giant – Installing the Rank Math Engine
Now that your data foundation is ready in Google Analytics, it is time to return to your WordPress dashboard to activate the engine that will drive your SEO. The installation process is straightforward and designed to get you up and running in minutes.
1. Locating the Plugin
From your WordPress sidebar, navigate to Plugins > Add New Plugin. This opens the official WordPress repository where you can access thousands of tools.
2. Executing the Search
In the search bar located at the top-right of the screen, type “Rank Math.” The page will refresh, and you should see the Rank Math SEO plugin appear as the primary result. It is easily recognizable by its purple and white branding.
3. Installation and Final Step
To begin the process, click the “Install Now” button. You will see a small progress wheel; wait a moment while WordPress downloads and prepares the files on your server.
Once the installation is complete, the button will change to a blue “Activate” button. Clicking this is the final step in making the plugin live on your site, which will automatically trigger the Setup Wizard to help you finalize your configuration.
Once the installation is finished, the process transitions to its final phase. The “Install Now” button will transform into a blue “Activate” button.
Clicking “Activate” is the final step to enable Rank Math on your website. Instead of just sitting in your files, the plugin now becomes a functional part of your dashboard. This action typically triggers the Rank Math Setup Wizard, which will walk you through the remaining configuration steps to ensure your site is fully optimized for search engines.
Establishing the Link – Connecting Your Rank Math Account
With the plugin active, the next phase is to link it to the Rank Math ecosystem. This connection is the “key” that unlocks high-level features, including the built-in analytics dashboard and the automated suggestions that make the plugin so powerful.
1. Accessing the Connection Screen
Immediately after activation, the “Connect Free Account” screen should automatically appear on your dashboard. If for any reason it does not pop up, don’t worry—you can easily find it by navigating to the Rank Math SEO menu in your WordPress sidebar.
2. Why Connecting Matters
While you can use some basic features without an account, linking your site to a free Rank Math profile is essential for:
- Integrated Data: Allowing Rank Math to securely pull your Google Analytics and Search Console data directly into WordPress.
- SEO Updates: Receiving the latest algorithm-based optimization suggestions.
- Feature Access: Enabling advanced modules like the 404 monitor and Schema generator.
3. Initiating the Connection
On the screen, you will see a prominent button labeled “Connect Your Account.” Go ahead and click this to begin the secure authentication process. This will ensure that your website is officially registered and ready to receive all the benefits of the Rank Math platform.
Authenticating Your SEO Connection
Once you click the connect button, you will be redirected to the secure Rank Math authentication page. This step ensures that your website and your Rank Math profile are properly synced to enable data sharing and advanced features.
1. For Existing Users
If you have used Rank Math before or already created an account on their website, simply enter your credentials to log in. The system will recognize your site and link it to your existing profile instantly.
2. Joining the Rank Math Community
If you are new to the platform, click the “Register Now” option. Rank Math offers several flexible ways to create your free account, allowing you to choose the method that is most convenient for you:
- Social Logins: Use your existing Google or Facebook accounts for a one-click setup.
- WordPress.com: Link your account directly via your WordPress.com profile.
- Email Registration: Sign up using a standard email address and password.

Rank Math Login Page
3. Granting Permissions
Regardless of the method you choose, you may be asked to authorize the connection. Confirming this allows the plugin to verify your site and unlocks features like keyword suggestions and SEO analysis that require a secure connection to Rank Math’s servers.
Part 20: Finalizing Your Site’s Connection
Once the authentication is complete, you will see a summary screen confirming that your website is now successfully linked to your Free plan. This account level is incredibly robust, offering all the essential tools—like sitemap generation, basic schema markup, and content analysis—that most bloggers and small businesses need to thrive.
1. The Power of the Free Plan
While Rank Math offers a “Pro” version with advanced features like AI content generation and multi-location local SEO, the free version you are activating now is already a powerhouse. It bridges the gap between your website and search engines, ensuring your content is readable and relevant.
2. Activating the License
On this screen, simply click the “OK, Activate Now” button. This final confirmation “keys” the plugin to your specific domain. This step is vital because it:
- Syncs your settings: Ensures your SEO preferences are backed up to your Rank Math profile.
- Enables API features: Unlocks the “SEO Analyzer” and “Keyword Suggestions” that require a secure connection to Rank Math’s servers.

Rank Math Activation
3. Transitioning to the Setup Wizard
After clicking activate, the screen will refresh and automatically launch the Rank Math Setup Wizard. This guided tour is the final leg of your journey, where you will choose your optimization mode and fine-tune your site’s SEO identity.
Part 21: Choosing Your Path – The Rank Math Setup Wizard
After activating your license, you will enter the Rank Math Setup Wizard. This is a guided configuration process that helps you set the rules for how search engines interact with your site. You will be presented with three distinct modes:
1. Easy Mode
This is designed for beginners who want a “set it and forget it” experience. In this mode, Rank Math handles most of the configuration automatically using industry best practices. It hides more complex settings to keep the interface clean and straightforward.
2. Advanced Mode (Recommended)
This mode gives you full control over every aspect of your website’s SEO. While it is labeled “Advanced,” it is still very user-friendly. I recommend choosing this option because it unlocks critical features—like the 404 Monitor, Redirections, and detailed Schema Markup—that are essential for a professional setup. Don’t worry about the complexity; I will guide you through each setting.
3. Custom Mode
This mode is exclusive to Rank Math Pro users. It allows for even deeper levels of customization, such as importing pre-configured SEO settings from other websites. Since we are using the powerful free version, this option will be locked.
Starting the Journey
To begin your optimization, select “Advanced Mode” and click the “Start Wizard” button. This will launch the step-by-step process of defining your site type and connecting your recently created Google services.
Defining Your Identity – The “Your Site” Section
The first phase of the Setup Wizard is titled “Your Site.” This section is essential because the information you provide here populates your website’s metadata and Schema markup. This helps search engines like Google understand your brand’s identity and correctly display your “Knowledge Graph” (the informative box that often appears on the right side of search results).
1. Specifying Your Site Type
The first field, “[Your Site Name] is a,” requires you to categorize your platform.
- Options include: Personal Blog, Community Blog, News Site, Personal Portfolio, Small Business Site, or Webshop.
- Impact: Your choice allows Rank Math to automate specific SEO settings tailored to that niche.
2. Basic Branding Details
Next, you will fill in your foundational names:
- Website Name: Enter the primary name of your site as you want it to appear in search results.
- Website Alternate Name (Optional): If your site has a well-known acronym or a shorter nickname, enter it here. This is used as the alternateName in your site’s structured data.
- Person/Organization Name: Provide your official business name or your own name if the site represents you personally.

Site Details
3. Visual Identity for Google and Social Media
The final part of this section involves uploading images that represent your brand across the web:
- Logo for Google: Upload a square logo that Google can display in Knowledge Panels. The recommended size is at least 112 x 112 pixels.
- Default Social Share Image: This image acts as a fallback. If a post you share on platforms like Facebook or X (formerly Twitter) doesn’t have its own “Featured Image,” this one will be displayed instead.
- Recommended Dimensions: Use an image that is 1200 x 630 pixels for the best appearance on social feeds.
Once these fields are complete, click “Save and Continue” to proceed to the Analytics integration.
Integrating Your Insights – The Analytics Section
Now that you have defined your site’s identity, you have reached the Analytics integration stage. This is where the magic happens: by connecting the plugin to the Google services you prepared earlier, you will be able to monitor your traffic, keyword rankings, and indexing status directly within your WordPress dashboard.
1. Initiating the Connection
To bridge the gap between your website and Google’s data, locate the prominent blue button labeled “Connect Google Services.” Clicking this will trigger a secure authentication process with Google.
2. Granting Permissions
After clicking the button, a popup will ask you to select your Google account. Ensure you choose the same account you used to set up your Google Analytics and Search Console. You will be asked to grant several permissions, such as:
- Search Console Data: Allows Rank Math to see and manage your site’s search performance.
- Analytics Data: Enables the plugin to download and display your traffic and user engagement reports.
- Site Management: Lets Rank Math verify your site ownership and manage your sitemaps automatically.
3. Finalizing the Secure Bridge
Be sure to click “Allow” for each permission prompt to ensure all features work correctly. Once finished, you will be redirected back to the Rank Math Setup Wizard, where you will see your Search Console and Analytics properties listed, ready for final configuration.
Authorizing the Google Connection
After clicking the connect button, a secure Google login window will appear. Select the Google account you used to set up your tracking earlier and follow these steps to finalize the bridge:
1. Granting Access
You will be asked to grant Rank Math various permissions to access your Search Console and Analytics data. It is crucial to check all the boxes and click “Allow.” This ensures the plugin can pull your traffic stats and keyword rankings directly into your WordPress dashboard.
2. Verification
Once you confirm these permissions, Google will redirect you back to the Rank Math setup page. You’ll see a confirmation that your account is successfully linked, allowing you to select your specific website property from the dropdown menus in the next step.
Linking Your Search Console Property
After the Google authorization is complete, the wizard will reload with the Search Console configuration box visible.
Selecting Your Site
Locate the “Site” dropdown menu and select your website’s specific URL from the list. If you don’t see it immediately, give the system a few moments to finish syncing with Google’s servers.
Activating Index Insights
Make sure to toggle the switch for “Enable the Index Status tab” to the “On” position. This allows Rank Math to display crucial data about which of your pages are successfully indexed directly in your dashboard.
Configuring Your Analytics Properties
Directly below the Search Console settings, you will find the Analytics configuration box. This is where you finalize the connection to the Google Analytics 4 (GA4) property you created earlier.
1. Property Selection
In the dropdown menus, select your corresponding Account, Property, and Data Stream. These should match the names you set up in the Google Analytics interface.
2. Essential Tracking Settings
To ensure your data is accurate and compliant, configure the following toggles:
- Install Analytics Code: Switch this to “On”. This allows Rank Math to automatically place the tracking tag on your site, removing the need for extra plugins or manual coding.
- Exclude Logged-in Users: Turn this “On”. This prevents your own visits (and those of your team) from skewing your traffic data, ensuring your reports only reflect actual visitor behavior.
3. Advanced Features (Pro Version)
If you have upgraded to Rank Math Pro, you have access to two additional performance and privacy tools:
- Anonymize IP Addresses: Masks visitor IPs to comply with strict privacy laws like GDPR.
- Self-Hosted Analytics JS File: Hosts the tracking script on your own server to improve page load speeds by reducing external requests.
Monetization Insights – The AdSense Box
Below the Analytics configuration, you will find the AdSense section. This advanced integration is a premium feature exclusive to Rank Math SEO PRO users.
1. Unified Ad Performance
By linking your Google AdSense account, you can pull critical monetization data—such as earnings, impressions, and ad history—directly into your WordPress dashboard. This allows you to monitor how your content generates revenue without ever leaving your site.
2. Simple Configuration
To enable this, select your specific AdSense account from the dropdown menu in the AdSense box. Once connected, Rank Math will begin fetching your ad performance metrics automatically.
Saving Your Progress
After finalizing your Search Console, Analytics, and (if applicable) AdSense settings, click the “Save and Continue” button to move to the next stage of the Setup Wizard.
Mapping Your Content – The Sitemaps Section
The third step in the Rank Math Setup Wizard is Sitemaps. This file acts as a blueprint of your website, helping search engines like Google and Bing discover and index your content efficiently.
1. Automatic Detection
Rank Math automatically identifies all the content types on your site beyond the standard posts and pages. This includes custom post types and any taxonomies (like categories) you may have set up.
2. Customizing Your Map
In this section, you can decide exactly what you want to share with search engines:
- Include Images: Toggle this “On” to help your images appear in Google Image Search, which can drive significant additional traffic.
- Public Post Types: Select the specific content you want indexed. You should generally include Posts and Pages.
- Public Taxonomies: Choose which categories or tags to include. It is often recommended to include Categories but uncheck Tags to prevent issues with duplicate content.
3. Finalizing the Step
Simply uncheck any content types you do not want to appear in search results. Once you’ve selected your preferred types, click the “Save and Continue” button to move to the final optimization phase.
Fine-Tuning Your SEO – The Optimization Section
The fourth step in the Rank Math Setup Wizard is Optimization. This section provides several “SEO Tweaks” designed to automate technical tasks that would otherwise require manual coding or additional plugins. These settings help control how search engines interact with specific links and pages on your site.

1. Noindex Empty Category and Tag Archives
WordPress automatically creates archive pages for every category and tag you use. If these archives have no posts associated with them, they result in “thin content” pages that provide little value to users.
- What it does: Enabling this option tells search engines not to index these empty pages.
- Benefit: This prevents low-quality pages from cluttering search results, ensuring your “crawl budget” is spent on your most important content.
2. Nofollow External Links
When you link to another website, search engines often pass a small amount of “authority” (or link equity) to that site.
- What it does: This adds the rel=”nofollow” attribute to all outbound links automatically.
- Recommendation: While this prevents you from unintentionally boosting a competitor’s SEO, most experts recommend leaving this off unless you have a specific reason to nofollow all external content. Linking to high-quality, relevant resources is actually a positive signal for your own SEO.
3. Open External Links in New Tab/Window
This is a user experience (UX) setting that affects how visitors interact with your site.
- What it does: It adds the target=”_blank” attribute to all external links.
- Benefit: When a user clicks a link to another site, it opens in a new tab, keeping your website open in the original tab. This helps reduce your bounce rate and keeps users on your site longer.
Finalizing the Wizard
If you are unsure which settings to choose, the default configuration provided by Rank Math is perfectly safe for most websites. Once you’ve made your selections, click the “Save and Continue” button to complete the initial setup.

Crossing the Finish Line – Your Site is Ready!
The fifth step in the Advanced Mode Setup Wizard is the Ready screen. This page confirms that your basic SEO foundation is complete and offers one final essential setting before you finish.
1. Enabling Automatic Updates
On this screen, you should toggle the Automatic Update option to “On”. Keeping Rank Math updated is vital for several reasons:
- Latest Features: You’ll gain instant access to new SEO tools as they are released.
- Performance & Security: Updates include critical bug fixes and security patches that keep your site safe and fast.
- Reliability: Automated updates ensure your SEO tools remain compatible with the latest versions of WordPress and Google’s algorithm changes.
2. Moving to Advanced Options
Once you have enabled auto-updates, do not exit just yet. Click the “Setup Advanced Options” button. This will take you to a final set of high-level configurations, including the Role Manager and the 404 Monitor, which give you even granular control over your site’s health and security.
Managing Team Permissions – The Role Manager
The Role Manager is a specialized feature in the Advanced Mode that gives you granular control over who can modify your website’s SEO settings. This is essential for websites with multiple contributors, as it prevents accidental changes to critical configurations while allowing team members to perform their specific tasks.

1. Controlling Access
Instead of giving every team member full administrative access, the Role Manager allows you to restrict Rank Math’s features based on a user’s specific role (e.g., Editor, Author, or Contributor). You can choose to enable or disable access to:
- On-Page SEO Settings: Allow authors to optimize their own titles and descriptions without touching sitewide settings.
- Advanced Settings: Restrict access to technical tools like the 404 Monitor or Redirections to administrators only.
- Analytics Reports: Decide which users are permitted to view your traffic and ranking data.
2. Maintaining Security and Consistency
By defining these permissions, you ensure your SEO foundation remains secure and consistent. If you are the only one managing your site, you can simply keep this module disabled to keep your dashboard clean.
3. Finalizing Roles
Once you have reviewed the permissions for each role, click “Save and Continue” to move to the final technical monitoring tools.
Monitoring Site Health – 404 Monitor & Redirections
After configuring user roles, you will reach the 404 Monitor & Redirections section. These two tools work together to ensure that visitors never hit a “dead end” on your website, which is crucial for both user experience and maintaining your search engine rankings.
1. 404 Monitor
A 404 error occurs when a user or search engine tries to access a page that cannot be found on your server.
- What it does: Enabling this module allows Rank Math to log every instance of a “Page Not Found” error.
- Why it matters: It helps you identify broken links or typos in URLs so you can fix them before they drive visitors away.
- Recommendation: Turn this “On” to keep a pulse on your site’s health.

2. Redirections
This tool allows you to automatically send users from a non-existent URL to a live, relevant page.
- What it does: It enables you to set up permanent (301) or temporary (302/307) redirects.
- SEO Benefit: By redirecting a broken URL that has existing backlinks to a new page, you “rescue” that SEO value (link juice) and pass it to the new content.
- Recommendation: Turn this “On” so you can instantly fix the errors identified by the 404 Monitor.
Once you have enabled these features, click the “Save and Continue” button to move to the final configuration step.
Structured Data – The Schema Markup Section
The final step in the Advanced Setup Wizard is Schema Markup. This adds “structured data” to your site—a specialized code that helps search engines understand your content’s context.

1. Why It Matters
Schema acts as a translator. While humans see a blog post, schema tells Google: “This is an Article with a specific author and date”. This clarity makes you eligible for Rich Results (like star ratings, prices, or FAQ dropdowns), which can significantly boost your click-through rate (CTR).
2. Default Settings
Rank Math automates this by setting global defaults:
- Posts: Automatically set to Article schema.
- Pages: Usually set to Article or Service depending on your site type.
3. Recommendation
If you’re unsure, leave everything at the default configuration. Rank Math’s presets are optimized for the majority of websites. Once you’re ready, click “Save and Continue” to finish the setup.
Mastering Redirections – Keeping Your Site Error-Free
After completing the initial setup, you can further refine how your site handles missing content by navigating to Rank Math SEO > General Settings and selecting the Redirections tab. Managing these settings properly ensures a seamless experience for your visitors and maintains your site’s search integrity.
1. Essential Redirection Tweaks
Here is how to configure your redirection rules for the best results:
- Debug Redirections: Keep this OFF. This is only used for troubleshooting to see how URLs behave without active rules.
- Fallback Behavior: Select Default 404. While it might be tempting to redirect every error to your homepage, doing so can confuse users and hurt your SEO; letting a 404 page show is the safer, standard practice.
- Redirection Type: Choose 301 Permanent Move. This is the industry-standard status code that tells search engines your content has moved permanently, preserving its ranking value.
- Auto Post Redirect: Toggle this ON. This is a “lifesaver” feature—if you ever change the URL (slug) of a post, Rank Math will automatically create a redirect from the old link to the new one, preventing broken links instantly.
2. Saving Your Configuration
Once you have adjusted these toggles to match the recommendations above, scroll to the bottom of the page and click the “Save Changes” button to apply your new rules.
Setting Up Instant Indexing
Instant Indexing is a powerful feature that bypasses the traditional “wait and see” crawl cycle. Instead of waiting days or weeks for search engines to discover your new content, this tool sends a direct “push” notification to notify them of updates almost immediately.

1. Why Use Instant Indexing?
- Faster Rankings: This is especially critical for time-sensitive content like news, product launches, or seasonal updates.
- Immediate Discovery: It informs participating search engines (like Bing and Yandex) via the IndexNow protocol the moment you publish, update, or delete a post.
- Efficiency: By notifying search engines exactly which pages have changed, it reduces the need for exploratory crawling, which lowers the load on your server.
2. Configuring the API Key
To get started, follow these steps to verify your site’s ownership and activate the service:
- Locate the Key: Navigate to Rank Math SEO > Instant Indexing and click the “Settings” tab. You will see a unique API Key generated automatically by Rank Math.
- Create the Verification File: Copy this API Key and paste it into a simple text editor (like Notepad). Save this file exactly as [your-api-key-code].txt.
- Upload to Root Directory: Using an FTP client (like FileZilla) or your hosting cPanel’s File Manager, upload this .txt file to your website’s root directory.
Note: The root directory is the main folder where your WordPress installation lives, typically named public_html, www, or htdocs. You should see files like wp-config.php in this same folder. - Verify the Connection: Return to the Instant Indexing settings in WordPress and click the “Check Key” button. A new tab will open; if it displays your API key, search engines can now successfully verify your site and accept your indexing requests.

Instant Indexing Setting Api
3. Automatic vs. Manual Submissions
Once verified, ensure you select the Post Types (such as Posts and Pages) that you want Rank Math to submit automatically whenever you hit “Publish”. For older content that isn’t appearing in search results, you can use the “Submit URLs” tab to manually request an immediate crawl.
Setting Up LLMS (Large Language Model Signals)
LLMS (Large Language Model Signals) is a forward-thinking feature in Rank Math designed for the era of AI-driven search. It generates a specialized llms.txt file at your site’s root (e.g., yourdomain.com/llms.txt) that acts as a curated “welcome mat” for AI models like ChatGPT, Claude, and Gemini.
While traditional sitemaps tell search engines where your pages are, the llms.txt file tells AI models which parts of your content are the most valuable and trustworthy to use in their generated answers.
Step 1: Enable the Module
- Go to your WordPress dashboard and navigate to Rank Math SEO > Dashboard.
- Scroll through the available modules until you find LLMS Txt.
- Toggle the switch to “On”.
- Once active, click the Settings button that appears next to the toggle.
Step 2: Configure Your AI Signals
On the settings page, you will define what the AI “sees” when it scans your site. Use the following recommendations for a balanced setup:
- Select Post Types: Check the boxes for content that represents your best, most authoritative information—typically Posts, Pages, and Products.
Pro Tip: Rank Math automatically excludes any content set to “noindex,” so your private pages remain hidden from AI models too. - Select Taxonomies: Enable Categories to help AI understand the topical structure of your site. You can include Tags if they are highly relevant to your niche.
- Posts/Terms Limit: This prevents the file from becoming a massive list that confuses AI agents. A limit of 50 to 100 is usually perfect for most sites.
- Additional Content: This is a powerful field where you can manually add custom text or specific URLs—like your Cornerstone Content or a brief site summary—that you want AI models to prioritize above all else.

Llms
Step 3: Save and Verify
After making your selections, click the “Save Changes” button. To verify it is working, type yourdomain.com/llms.txt into your browser. You should see a clean, Markdown-formatted list of your top content, ready for the next AI bot that visits.
Integrating Custom Fields – The ACF Module
If you are a developer or a power user, you likely use the Advanced Custom Fields (ACF) plugin to add custom data like job details, review metrics, or unique specifications to your content. By default, most SEO plugins can’t “see” this data because it sits outside the standard WordPress content editor.
1. Bridging the SEO Gap
The ACF module in Rank Math solves this problem by creating a full bridge between your custom fields and your SEO optimization tools. Once enabled, Rank Math can:
- Analyze Your Content: Rank Math will include the text within your ACF fields in its SEO analysis and content scoring, giving you a more accurate picture of your page’s optimization.
- Generate Rich Schema: You can pull data directly from your custom fields to populate Schema markup (like using an ACF “price” field for Product Schema).
- Include Images in Sitemaps: If you use ACF for images, Rank Math can automatically detect and include them in your XML sitemaps to improve your image search rankings.
2. How to Enable the ACF Module
If you have the ACF plugin installed, follow these steps to activate the integration:
- Navigate to Rank Math SEO > Dashboard.
- In the Modules tab, scroll down until you find the ACF information card.
- Toggle the switch to “On”.

ACF Module
3. Recommendation
You should only enable this module if you are actively using Advanced Custom Fields to store important content. Keeping unnecessary modules turned off helps keep your WordPress database lean and your dashboard clutter-free.
Dominating Local Search – Setting Up Local SEO
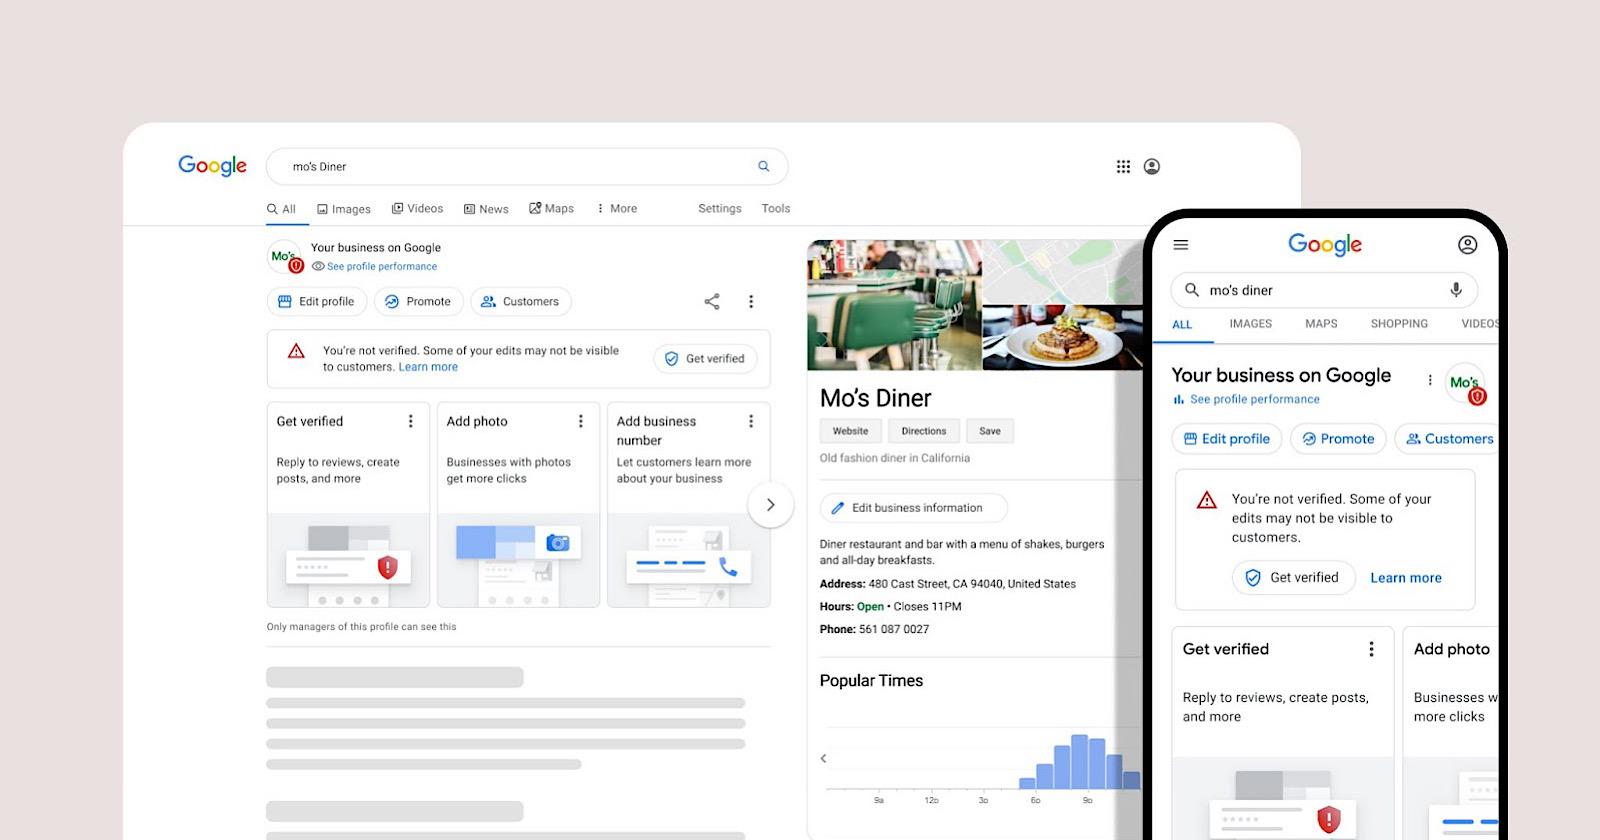
Local SEO is a specialized set of optimization techniques designed to help search engines understand the physical presence of your business. By enabling this module, Rank Math adds LocalBusiness Schema (structured data) to your site, which provides Google with specific details like your address, phone number, and hours of operation. This is the key to appearing in the Google Maps “Local Pack” and “near me” search results.

1. Who Should Use Local SEO?
- Essential for Businesses: This is a must-have for restaurants, clinics, local shops, agencies, or any service provider with a physical location or defined service area.
- Optional for Blogs: Most general blogs do not need this module. However, if your blog is a personal brand, a portfolio, or focuses on a specific local niche (like regional travel), enabling it can help establish your authority in that area.
2. Step-by-Step Activation
- Navigate to Rank Math SEO > Dashboard.
- Locate the Local SEO module and toggle the switch to “On”.
- Click the Settings button (or go to Rank Math SEO > Titles & Meta > Local SEO) to begin entering your business identity.
3. Configuring Your Business Identity
Once inside the settings, you need to fill out your “Knowledge Graph” details accurately. This information tells Google exactly who you are:
- Person or Company: Select “Organization” for a business or “Person” if the site represents a personal brand or individual.
- Website & Business Name: Enter your official business name. If you have a shortened name or acronym, add it to the Website Alternate Name field.
- Logo: Upload your official logo. Google requires a minimum of 112 x 112 pixels, but a high-resolution square image is best for clarity in search results.
- Contact Details: Enter your primary URL, Email, and Phone Number. Ensure these match exactly what is listed on your social media profiles and Google Business Profile for consistency.
- Physical Address: Add your full street address, city, and postal code. This data is used to generate the map coordinates that search engines use to verify your location.
- Essential Pages: Use the dropdown menus to select your About Page and Contact Page. This helps Google verify your business’s legitimacy and provides users with a clear path to reach you.
Pro Tip for Multi-Location Businesses: If you have more than one office or shop, the Rank Math PRO version allows you to enable a “Multi-location” feature, which generates unique Schema for every individual branch.
Maximizing Your Local Reach
Within the Local SEO settings, you will encounter a specific advisory note from Rank Math that reads:
“Use the {rank_math_contact_info} shortcode to display contact information in a nicely formatted way. You should also claim your business on Google if you have not already.”
This note highlights two essential actions for every local business owner:
A. The Contact Info Shortcode
This is a powerful automation tool designed to save you time and prevent manual errors.
- What it means: Instead of manually typing your business name, address, and phone number on various pages, you simply paste the {rank_math_contact_info} shortcode into your footer, sidebar, or contact page.
- The Benefit: Rank Math pulls the data directly from your Local SEO settings and displays it in a clean, professional format. Most importantly, if your phone number or office location ever changes, you only have to update it once in the Rank Math settings, and it will automatically update across your entire website.
B. Claiming Your Google Business Profile
The second part of the notice refers to your Google Business Profile (formerly Google My Business).
- What it means: Rank Math optimizes your website, but you must also verify your physical business directly with Google.
- The Importance: Claiming your profile is what allows your business to appear in the Google Maps “Map Pack”. It ensures that when someone searches for your business, they see the correct hours, high-quality photos, and customer reviews. Without this step, even the best website SEO might not be enough to get you into the top local results.
Customizing Your Setup – Setting Up Other Modules
While the initial setup covers the essentials, Rank Math is designed to be modular so it can grow with your website. Depending on your site’s specific functionality—whether you run a forum, an e-commerce store, or a news site—you may want to activate specialized modules to ensure every part of your site is search-engine friendly.
1. Activating and Configuring Modules
To customize your feature set, follow these steps:
- Navigate to Rank Math SEO > Dashboard.
- Ensure you are on the Modules tab.
- Toggle the Switch: Find the module you need (such as AMP, bbPress, BuddyPress, or WooCommerce) and toggle it “On”.
- Access Settings: Once a module is active, a Settings button will appear within its box. Click this to fine-tune how that specific feature interacts with your site.
2. Standard vs. Specialized Modules
- Community & Engagement: Modules like bbPress and BuddyPress allow Rank Math to add proper meta tags to forum posts and user profiles, which are often difficult for standard SEO plugins to index correctly.
- Performance: The AMP module ensures that your Accelerated Mobile Pages have the required meta tags for fast-loading mobile search results.
- Visibility: The Image SEO module can automate the task of adding ALT and Title tags to your images on the fly, saving hours of manual work.
3. Rank Math Pro: Taking It Further
While many core features are free, certain high-level modules and advanced functionalities are reserved for Rank Math PRO users:
- Exclusive Modules: Advanced features like Video Sitemap, Podcast, and News Sitemap require the Pro version.
- Enhanced Capabilities: Existing modules become significantly more powerful in Pro. For example, you get deeper insights in Analytics, advanced Schema types for structured data, and the ability to manage Multiple Locations in Local SEO.
Turning Strategy into Action – Optimizing Your Content
Now that setup is complete, you can begin using the Rank Math Content Analyzer to optimize your pages. This real-time tool evaluates your content and provides actionable suggestions to improve your search visibility as you write.
1. How the Content Works
The tool acts as a live SEO coach by checking several key factors:
- Keywords: It monitors how often and where you use your focus keywords.
- Structure: It analyzes your titles, headings, and overall content layout.
- Links & Media: It checks for proper internal and external linking, as well as image optimization.
- Readability: It ensures your text is easy for both users and search engines to understand.
2. A Universal Workflow
Whether you are optimizing a blog post or a WooCommerce product, the process is the same. Rank Math guides you step-by-step, showing you exactly what needs improvement to achieve a high SEO score.
Opening the Rank Math SEO Panel in Classic Editor
When you’re using the WordPress Classic Editor, Rank Math integrates directly into the post editing screen. You don’t need any page builder to optimize your content—everything is available right below the editor.

1. Accessing the Rank Math SEO Box
To start optimizing your post or page, open it in the Classic Editor.
Scroll down below the main content editor, and you’ll see the Rank Math SEO meta box.
This panel contains all essential SEO settings, including focus keywords, SEO analysis, schema options, and snippet customization—without leaving the editor.
Setting Your Focus Keywords
Inside the Rank Math meta box, the General tab is where you define your focus keywords. This tells search engines exactly what your content is about.
-
Main Keyword: Enter the primary keyword you want to rank for.
-
Keyword Suggestions: As you type, Rank Math suggests related keywords based on real search data.
-
Multiple Keywords: The free version allows up to 5 focus keywords per post.
-
Pro Advantage: Rank Math Pro removes this limit, allowing unlimited secondary keywords—ideal for long-form and pillar content.
Mastering the SEO Checklist
Below the focus keyword section, Rank Math displays the SEO Checklist, which acts as a practical on-page optimization guide.
1. The Four Pillars of the Checklist
Each tab focuses on a different SEO area:

-
Basic SEO
Checks whether your focus keyword appears in the SEO title, meta description, URL, content, and opening paragraph. It also evaluates content length. -
Additional
Covers keyword usage in subheadings (H2, H3), image ALT text, keyword density, internal links, and external links. -
Title Readability
Analyzes how attractive your title is by checking for power words, numbers, and keyword placement. -
Content Readability
Ensures your content is easy to read by recommending short paragraphs, media usage, and structured formatting like tables of contents.
2. Understanding Your SEO Score
As you complete the checklist items, your SEO score updates dynamically:
-
Red (Below 50): Poor optimization
-
Yellow (51–80): Good, but needs improvement
-
Green (81+): Well-optimized and ready to publish
Recommendation: Aim for a score of 85 or higher. This balances strong SEO with natural, human-friendly writing.
Advanced Schema Customization in Classic Editor
Rank Math allows you to assign custom Schema markup to individual posts, giving search engines better context about your content.
1. Why Per-Post Schema Matters
Different posts serve different purposes. Assigning the correct schema improves your chances of getting rich results:
-
How-to Guides → HowTo schema
-
Reviews → Review schema (star ratings)
-
Blog Posts → Article schema

Schema Rank Math
2. How to Customize Schema in Classic Editor
To edit the schema for a post:
-
Scroll to the Rank Math SEO meta box
-
Open the Schema tab
-
Click Schema Generator
-
Choose a schema type
Available Schema Types
-
Free Version: Article, Book, Course, Person, Product, Recipe, Restaurant, Service, Software, Video
-
Rank Math Pro: FAQ, Dataset, Fact Check, and more
3. Using the Schema Builder
After selecting a schema type:
-
Fill all fields for better rich result eligibility
-
Use tooltips and field descriptions for guidance
-
Free Version Limitation: Only one schema per post
-
Pro Feature: Multi-schema support (e.g., Article + FAQ)
Perfecting Your Meta Title and Meta Description
Meta titles and descriptions define how your page appears in Google search results and heavily influence click-through rate.

1. Accessing the Snippet Editor
-
Open the General tab in the Rank Math box
-
Click Edit Snippet
-
Preview how your page appears on mobile and desktop
2. Writing High-Impact Metadata
-
SEO Title:
Include your primary keyword and keep it under 60 characters -
Meta Description:
Summarize the content clearly and stay under 160 characters -
Progress Bars:
Rank Math’s color indicators help you stay within optimal length
3. Using Dynamic Tags
Click the dropdown icon inside title or description fields to insert dynamic tags:
-
Automation: Post Title, Site Name, Category, Date
-
Consistency: Great for maintaining branding across posts
4. Finalizing Your Content
Once keywords, checklist items, schema, and metadata are optimized, your post is fully search-ready.
You can now Save Draft, Update, or Publish with confidence.
Global Metadata & Indexing Controls
Rank Math also offers global settings to manage large websites efficiently.

1. Global Meta Templates
Useful for sites with many categories or products:
-
Create templates for categories, tags, or products
-
Automatically applies to all current and future items
-
Ensures consistent branding in search results
2. Manual Indexing Control
You can control which content appears in search engines:
-
Hide low-value pages (thank-you pages, portals)
-
Prevent accidental indexing of private or internal pages
-
Apply rules globally to specific post types
Global Meta Titles & Descriptions
Global templates automatically generate metadata using dynamic variables.
1. When to Use (and Avoid) Global Templates
-
Best for: Categories, WooCommerce products
-
Avoid for: Individual blog posts (manual optimization works best)
2. How to Configure Global Meta
Go to Rank Math SEO → Titles & Meta
-
Select content type (Categories, Tags, Products)
-
Combine static text with dynamic tags
-
Common tags:
%title%,%category%,%sep%,%sitename%
Example output:
Summer Collection – My Store
3. Pro Tip: Category-Level Optimization
Instead of one generic template, assign unique metadata per category to match different search intents.
Fine-Tuning Visibility – Setting No Index
Some pages don’t deserve search visibility and can harm SEO if indexed.
1. Why Use No Index?
-
Prevent indexing of low-value or duplicate pages
-
Avoid thin author archives or empty tags
-
Keep internal-only pages private
2. How to Set Site-Wide No Index
-
Go to Rank Math SEO → Titles & Meta
-
Select the content type
-
Enable Robots Meta
-
Uncheck Index
-
Click Save Changes
3. Automatic Safety Features
-
IndexNow: Submits URLs instantly to Bing & Yandex
-
No Index Protection: No-index pages are excluded automatically
Unlocking Growth – Rank Math SEO Pro Features
Rank Math Pro is designed for scale, not just features.
Scaling with Unlimited Websites
1. How the License Works
-
Use Pro on unlimited personal websites
-
Install Pro alongside the free version
-
Core SEO handled automatically
2. Effortless Activation
-
Log in with your Rank Math account
-
Features activate instantly
-
Run the Setup Wizard per site
3. Choosing the Right Plan
-
Pro: Unlimited personal sites
-
Business / Agency: 100–500 client sites
Winning Rich Results with Multi-Schema (Pro)
1. Why Multi-Schema Matters
Modern pages serve multiple purposes:
-
Blog + FAQ
-
Product + Review + Video
-
Tutorial + HowTo
Multi-schema gives search engines richer context.
2. How to Add Multiple Schemas (Classic Editor)
-
Open Schema Generator
-
Add first schema and save
-
Reopen generator and add another schema
-
Rank Math lists all applied schemas
3. The Visual Advantage
Multi-schema increases eligibility for:
-
Star ratings
-
FAQs
-
Pricing
-
Rich snippets
Pro Tip: Always set the most important schema as Primary Schema.
Specialized Visibility – Additional Sitemap Modules
While the free version provides a standard XML sitemap for posts and pages, Rank Math Pro introduces specialized sitemaps designed for specific media types. These modules ensure that Google and other search engines don’t just “find” your content, but categorize it correctly for high-visibility search features.

1. News Sitemap (For Publishers)
If you publish timely articles or news-related content, the News Sitemap is a must-have for entering the Google News carousel.
- Speed to Index: This sitemap tells Google exactly which posts are “fresh” (published within the last two days), helping them appear in the news tab almost instantly.
- Compliance: It automatically manages technical requirements, such as including the publication name and language, and limiting the sitemap to the most recent 1,000 URLs as per Google’s guidelines.

News Podcast Sitemap
2. Video Sitemap (For Content Creators)
Websites that host or embed videos (from YouTube, Vimeo, or their own server) can use the Video Sitemap to win rich snippets in the “Videos” tab of search results.
- Auto-Detection: Rank Math Pro automatically scans your content for videos and fetches metadata like the thumbnail, duration, and description.
- Enhanced Ranking: By providing structured data through this sitemap, your page—not just the video platform—has a higher chance of ranking for video-related search queries.

3. Podcast Sitemap (For Audio Creators)
The Podcast Sitemap is designed to help your audio content reach listeners on platforms like Google Podcasts.
- Structured Audio: It generates a compliant RSS feed and includes PodcastEpisode Schema, making it easier for search engines to identify episode numbers, show notes, and audio files.
- Audience Reach: This specialized sitemap ensures your podcast is indexed accurately, improving its chances of being discovered by people searching for audio content in your niche.
Optimizing with Content AI Credits
When you upgrade to Rank Math Pro, you don’t just get advanced SEO settings; you also receive a generous trial of Content AI, Rank Math’s built-in personal writing assistant. This tool acts as an on-page SEO coach, helping you generate high-quality, search-optimized content directly within your workflow.
1. Your Initial Credit Allocation
Your Rank Math Pro subscription includes a 15-day trial of the Content AI Starter plan, which provides 5,000 credits to get you started.
- Immediate Use: You can use these credits right away to generate SEO-optimized meta titles, descriptions, and OpenGraph tags.
- Efficiency Boost: The AI helps you skip the “blank page” phase by providing title suggestions and content outlines based on real-time competitor research.
2. Understanding Credit Usage
Credits are consumed based on the complexity of the task:
- Word Generation: Every word the AI writes for you costs 1 credit.
- Keyword Research: A deep dive into a specific topic costs 500 credits.
- Image Alt Text: Generating descriptive tags for your images costs 50 credits each.
- Fix with AI: Using the AI to automatically correct specific SEO checklist errors (like moving a keyword to the first 10% of your text) costs 1 credit per word read and written.

Content Ai
3. Scaling Beyond the Trial
Because Content AI is a credit-based system, heavy users—such as those rewriting long articles or generating daily blog posts—may exhaust their initial 5,000 credits.
- Subscription Tiers: If you find the tool indispensable, you can subscribe to dedicated annual plans that refresh your credits every month.
- Flexible Plans: Options range from the Starter plan (5,000 monthly credits) for beginners to the Expert plan (30,000 monthly credits) for high-volume content creators.
- Use It or Lose It: Note that monthly credits do not roll over; they reset at the start of each billing cycle, so it’s best to use your full allowance to maximize your content output.
Strategic Insight with Google Trends Integration
Effective SEO is as much about timing as it is about keywords. Rank Math Pro bridges the gap between content creation and market research by bringing Google Trends directly into your WordPress editor. This integration eliminates the need to switch tabs to verify if a keyword is worth your effort, allowing you to make data-driven decisions while you write.

1. Real-Time Search Interest
The most significant advantage of this tool is the ability to see current demand for your chosen terms. Instead of relying only on static search volume, you get a live look at whether a keyword is trending upward or losing steam. This is particularly useful for seasonal topics or rapidly evolving niches where yesterday’s popular terms might be irrelevant today.
2. Compare and Conquer
If you are torn between similar focus keywords, the Google Trends tool allows you to compare them side-by-side using a color-coded graph. By visualizing search interest, you can instantly identify which term has higher demand in your target region. You can filter these results by country and specific time ranges—such as the last 30 days or the past year—to ensure your strategy aligns with your audience’s behavior.
3. Workflow Efficiency
To use this feature, simply enter your keywords in the Focus Keyword box within the Rank Math panel and click the Google Trends icon. A pop-up will appear where you can:
- Add and Compare Keywords: Enter multiple variations to find the “rising star” term.
- Filter by Location and Time: Narrow your data to the specific country and period most relevant to your goals.
- Export to Editor: Once you find the winning keyword, click “Close & use selected keywords” to automatically update your focus keywords in the post editor.
By choosing search terms that are growing in popularity, you position your content to ride the wave of future search traffic rather than investing in declining topics.
Mastering Data with Advanced Rank Tracking
Tracking your progress is the only way to know if your SEO efforts are actually paying off. While the free version gives you a baseline, Rank Math Pro allows you to track up to 500 keywords simultaneously, all from within your WordPress dashboard. This eliminates the need for expensive third-party tracking tools and keeps your data exactly where you work.
![]()
1. Centralized Performance Monitoring
Managing a growing site means keeping an eye on hundreds of different search queries. With a 500-keyword limit, you can monitor everything from your high-traffic “money” keywords to smaller long-tail variations.
- Real-Time Updates: Rank Math pulls data directly from Google, giving you an accurate look at your current positions, impressions, and click-through rates.
- Historical Trends: You can view your ranking history for the past 12 months. This allows you to spot patterns—like whether a specific post is slowly climbing or if a recent Google algorithm update caused a sudden dip.
2. Identifying Winners and Losers
The Rank Tracker doesn’t just show you a list; it helps you prioritize your work.
- Top Positions: Easily see which keywords have made it to the first page, so you can double down on what’s working.
- Opportunities for Improvement: Identify “striking distance” keywords—those sitting on pages 2 or 3 of Google—where a small update or a few internal links could push them into the top spots.
- Losing Ground: Proactively monitor keywords that are dropping in rank so you can refresh the content before you lose that traffic entirely.

Winning Posts
3. Simple Setup and Integration
To start tracking, navigate to Rank Math SEO > Analytics > Rank Tracker. You can add keywords individually or in bulk, and Rank Math will even offer to auto-add your focus keywords from your posts. Once connected to your Google Search Console account, the system begins monitoring your positions automatically, providing a clear visual graph of your site’s SEO health.
By replacing guesswork with real data, you can make smarter decisions about which articles to write next and which existing pages deserve your attention.
Advanced Analytics & Index Status Monitoring
Rank Math Pro replaces basic snapshots with a comprehensive SEO monitoring system. By integrating directly with Google Search Console and Google Analytics 4, it provides high-level metrics and granular details without ever requiring you to leave your WordPress dashboard.
1. Site Analytics Dashboard
The Site Analytics tab offers a birds-eye view of your entire website’s performance.
- Centralized Metrics: View traffic, impressions, and click-through rates (CTR) in one place.
- Performance Comparison: Rank Math color-codes your data—green for gains and red for drops—so you can instantly see if your recent optimizations are driving results compared to previous periods.
- Winning & Losing Posts: Pro identifies which pages have jumped the most in rankings and which have slipped, helping you prioritize where to focus your maintenance efforts.
2. The Index Status Report
One of the most valuable additions in the Pro version is the Index Status report. Indexing issues are a “silent killer” for SEO, as pages that aren’t indexed cannot receive traffic.

- URL Inspection API: This feature pulls data directly from Google’s URL Inspection API to show the real-time status of your pages.
- Detailed Verdicts: You can see exactly which pages are indexed, when they were last crawled, and which ones are being blocked by noindex tags or robots.txt issues.
- Actionable Fixes: If a page is deindexed or fails to appear on Google, the report highlights the error, allowing you to fix it and use the Instant Indexing button to request a re-crawl immediately.
3. Deep Keyword Insights
The Keywords section in Pro is a significant upgrade over the free version.
- Keyword Movement: Track how your keywords fluctuate over time. You can see your average position and how many keywords rank in the Top 3, Top 10, or Top 50 results.
- Position History: Pro keeps a record of your ranking history for the trailing 12 months, allowing you to identify long-term trends rather than just daily fluctuations.
- Individual Post Performance: You can drill down into any single post to see all the keywords it currently ranks for, making it easy to spot new “accidental” keywords you can further optimize for.
By consolidating these reports, Rank Math Pro saves you from managing multiple browser tabs and provides the clarity needed to keep your site competitive and fully indexed.
Beyond the Basics – Additional Pro Advantages
While we have highlighted the heavy hitters, Rank Math SEO Pro includes a suite of specialized tools designed to automate your workflow and provide a competitive edge in more technical areas of SEO. These features are built to grow with your site, ensuring that as your content becomes more complex, your tools remain up to the task.
1. Advanced Redirection & 404 Management
The Pro version elevates the standard redirection tool into a professional-grade manager.
- Scheduled Redirects: You can set specific dates for a redirect to activate or deactivate—perfect for limited-time seasonal promotions or temporary site migrations.
- Bulk Management via CSV: For large sites, you can export all your redirects to a CSV file, edit them in bulk using a spreadsheet, and re-import them in seconds.
- Regex and Category Support: Organize your redirects into categories for easier filtering and use Regular Expressions (Regex) to create complex, wide-reaching redirection rules with a single line of code.
2. Enhanced WooCommerce & Image SEO
If you run an online store or a media-heavy site, Pro offers deep automation that the free version cannot match.
- Global Product Identifiers: Easily add GTIN, MPN, and ISBN data directly to your WooCommerce products—even for individual variations. This is crucial for appearing in Google Shopping results.
- Advanced Image Watermarking: Protect your original photography by automatically adding watermarks to your images when they are shared on social media.
- Automated Alt Text: Pro allows for more complex “find and replace” rules for image attributes, ensuring your entire media library is optimized for accessibility and search without manual editing.
3. Priority Support & Frequent Updates
Upgrading to Pro also changes how you interact with the Rank Math team.
- 24/7 Priority Support: Pro users have access to a dedicated support ticket system with much faster response times than the public forums.
- Rapid Innovation: Rank Math is known for being the first to integrate new Google technologies (like the URL Inspection API or AI features). Pro users are always the first to receive these cutting-edge updates, often several times per month.
4. Custom Schema Builder
While the free version offers templates, Pro gives you a Custom Schema Builder. This allows you to “point and click” to import Schema from any website on the internet, which you can then modify and save as your own template—giving you total control over how your data appears in search results.
Ready to Upgrade?
If you have been enjoying Rank Math’s free features but are starting to feel limited, upgrading to Rank Math Pro is a strategic next step. This version unlocks deeper analytics, unlimited focus keywords, advanced schema controls, and smarter automation—all designed to scale your SEO efforts with professional precision.
1. The Power of the WP Rocket Bundle
Performance and SEO are two sides of the same coin. Rank Math offers a specialized SEO + Speed bundle that includes WP Rocket, one of the world’s most powerful caching plugins.
- Integrated Excellence: This bundle allows you to optimize your content with Rank Math while WP Rocket handles site speed, improves Core Web Vitals, and boosts your performance scores automatically.
- Exclusive Value: Purchasing them together as a bundle is significantly more cost-effective than buying them separately, offering a “one-stop” solution for ranking and speed.
2. High-Value Promotions and Bonuses
Rank Math frequently runs seasonal promotions (such as Black Friday or New Year sales) that “double the value” of your purchase.
- Benefit Multipliers: During these events, users often receive 2x benefits, such as 1,000 keyword tracking slots instead of 500, or a massive increase in Content AI credits.
- Partner Perks: A Pro upgrade often grants access to a “Partner Rewards” package worth over $25,000. This includes deep discounts on other premium tools like Imagify (image optimization), BackWPup (backups), and exclusive hosting deals.
3. Making the Decision
Whether you are a solo blogger, a growing business owner, or a freelancer managing a portfolio of client sites, the Pro version provides the firepower needed to outpace the competition.
- The Pro Plan: Ideal for individuals, supporting unlimited personal websites.
- Business & Agency Plans: Designed for those managing 100 to 500 client websites, including advanced white-label reporting features.
Upgrading sooner means benefiting faster from the data and tools that lead to higher rankings and more traffic.
Rank Math Free v/s Pro
Why Rank Math is better than other SEO plugins
Rank Math stands out because it delivers powerful SEO features without forcing users into expensive upgrades. It’s built for speed, flexibility, and real-world optimization—making it a favorite for beginners and advanced users alike.
1. More Features in the Free Version
Rank Math includes advanced tools like schema markup, redirections, 404 monitoring, XML sitemaps, and internal link suggestions—right out of the box. Many competing plugins reserve these essentials for paid plans.
2. Multiple Focus Keywords
Unlike many SEO plugins that restrict you to a single keyword, Rank Math allows multiple focus keywords per post. This helps optimize content for keyword variations and capture more search traffic.
3. Advanced Schema Markup Support
Rank Math offers rich schema options with an easy-to-use schema generator. You can assign different schema types to posts and pages, increasing eligibility for rich results like FAQs, reviews, and how-to snippets.
4. Lightweight and Performance-Friendly
Designed with modular architecture, Rank Math loads only the features you enable. This keeps your site fast and avoids unnecessary performance overhead.
5. Built-In Analytics and Search Data
You can view keyword rankings, impressions, clicks, and Google Search Console data directly inside the WordPress dashboard—no need to jump between tools.
6. Smart Automation with Full Control
From global meta templates to auto image ALT text and smart linking suggestions, Rank Math automates repetitive SEO tasks while still allowing manual overrides where precision matters.
7. Cost-Effective Pro Version
Rank Math Pro offers excellent value with generous site usage limits and features that would otherwise require multiple paid add-ons in other plugins.
8. Clean UI and Easy Setup
A guided setup wizard and a modern, intuitive interface make Rank Math easy to configure—even for users new to SEO.
Final Verdict
Rank Math combines power, simplicity, and affordability into a single SEO solution. Whether you’re running a blog, business site, or WooCommerce store, it gives you professional-level SEO tools without unnecessary complexity.
Conclusion: Your Path to Search Mastery
By now, you have built a complete roadmap for your website’s search engine success, moving from the initial installation and configuration of Rank Math to mastering high-level content optimization and exploring the professional-grade tools available in the Pro version.
Whether you are managing a personal blog, a growing business site, or a high-volume WooCommerce store, Rank Math provides the essential infrastructure to ensure your content is not just written, but discovered.

The true power of this plugin lies in its ability to translate complex technical requirements into a clear, actionable checklist, allowing you to focus on creating value while the software handles the underlying SEO architecture.
As you move forward, remember that the most successful SEO strategies are those that evolve alongside your website’s actual needs.
While the free version of Rank Math offers an incredible foundation that is more than enough for most beginners, the Pro version remains a vital asset for those ready to scale through automation, specialized sitemaps, and data-rich rank tracking. By applying these tools consistently and monitoring your performance through the integrated analytics dashboard, you can stop guessing what works and start making data-driven improvements.
Now is the time to put these lessons into practice by running a final SEO audit on your homepage and fine-tuning your most important articles to reach a score of 80 or higher.
SEO is a long-term journey, but with Rank Math as your guide and a commitment to regular content refreshes, your website is well-positioned for sustainable growth and stronger visibility in 2026 and beyond.


